Getting Started
In this section you will learn how to prepare and start operating CPT Control Software.
First steps
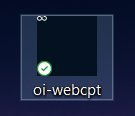
Firstly, the operator should launch the CPT Control Software by double-clicking on an executable:
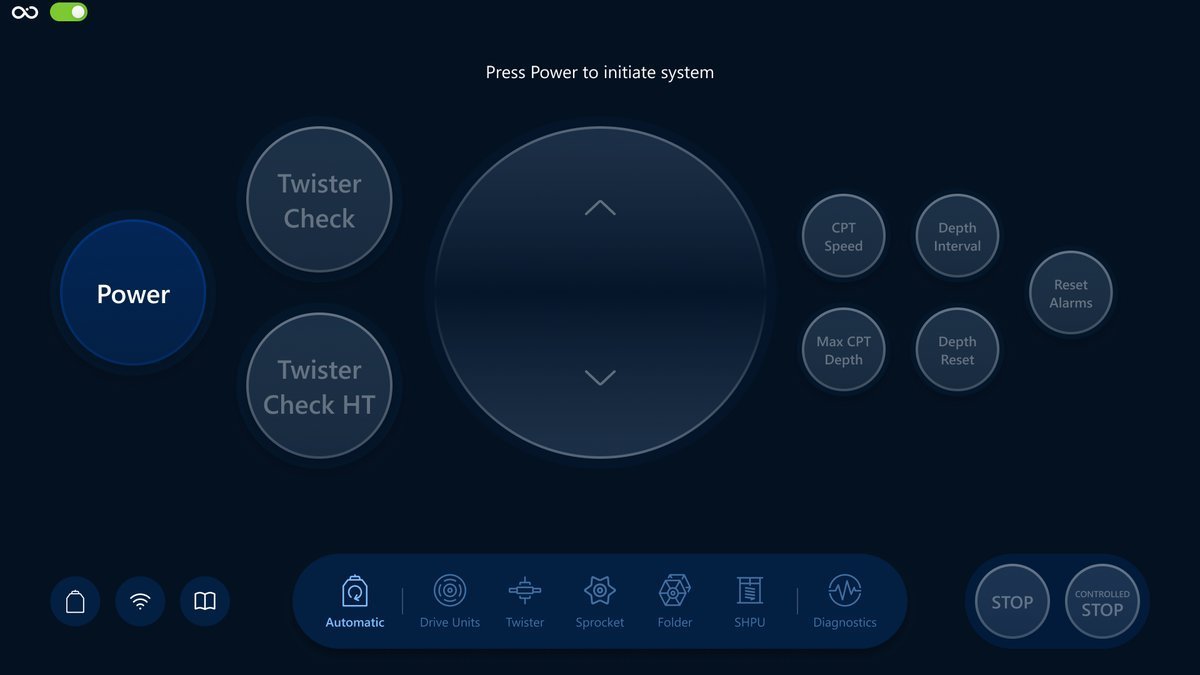
Once the software is ready, you'll see one of the CPT Control screens, for example, the Automatic screen:
Refreshing HMI Application
If the application becomes unresponsive, use CTRL + R to refresh its state.
Closing HMI Application
If you need to close the application, please press alt + f4 or terminate the process in the task manager.
What is status?
In our case, the status is the current condition or state of a system or the button. When you see the color of a button change, it means the status of this button has also changed.
You can track the status change and see the meaning of it by looking at the system status message, which is displayed on the top of each screen, besides Diagnostics.
On a previous picture the status of the Power button is enabled and has a blue color, indicating that this button is ready for interaction.
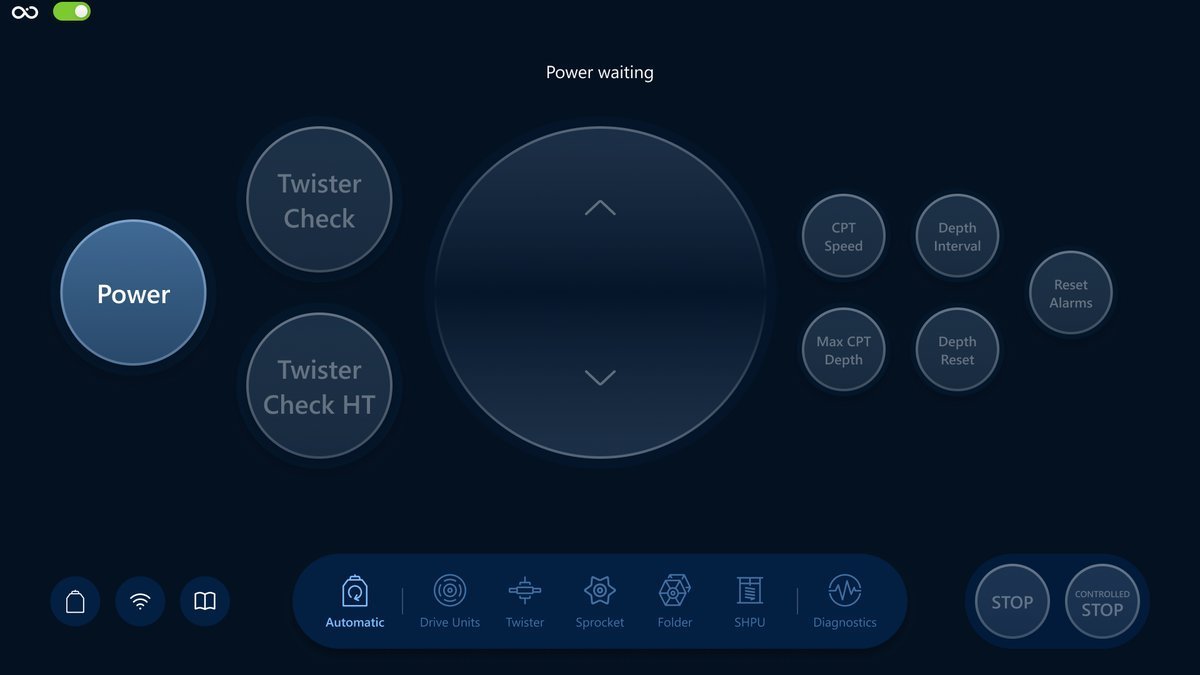
After a tap on the Power button, we should see the state change to the waiting status which has a light blue color and the system status message changed to Power command waiting:
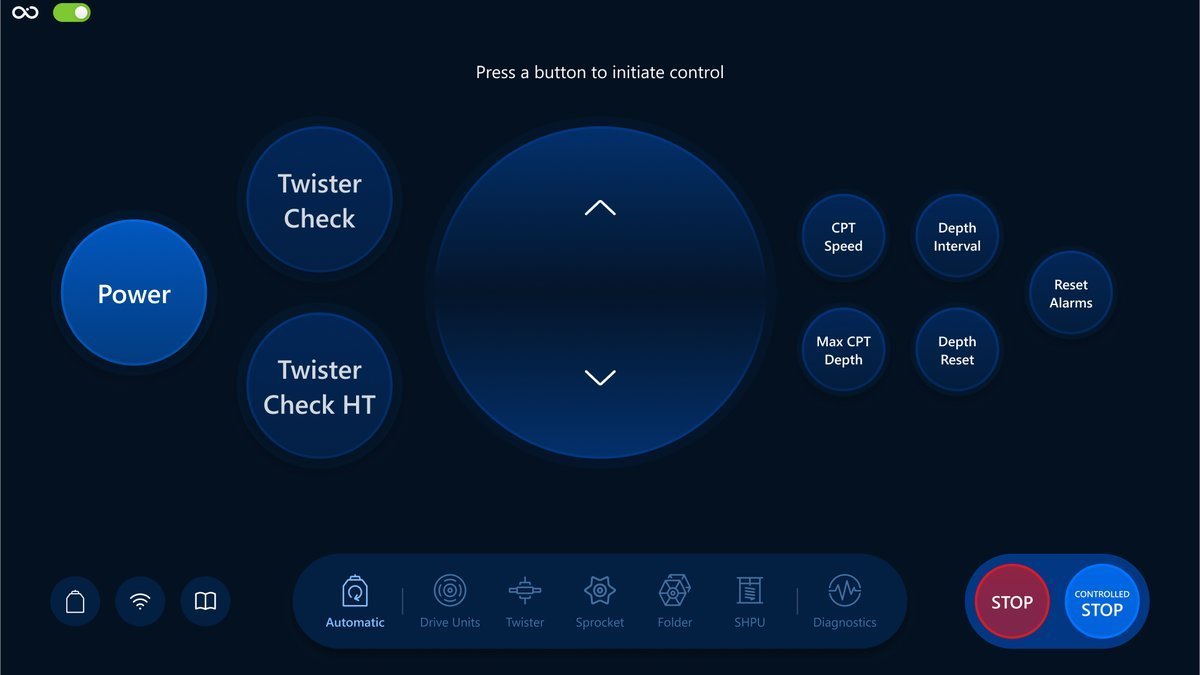
The next step is to wait until the button turns to activated status and gets a bright blue color, indicating that ST Roson operating:
Disabled buttons
There is one important thing to mention. As you can see, there are gray buttons when Roson system is not initiated, meaning that the button is currently inactive and cannot be interacted with. This state is often used when certain conditions must be met before the button becomes active. It visually communicates that the option is currently unavailable. The main thing about the disabled button is that you can't interact with it until it turns to a status that enables interaction, like the Power button when CPT Software is off. There are a couple of actions you can do when CPT is not initiated:
Power button
Tap on the Power button to initiate the system, if there are no network errors keeping it disabled. More about the Automatic mode: Automatic screen overview.
Network connection
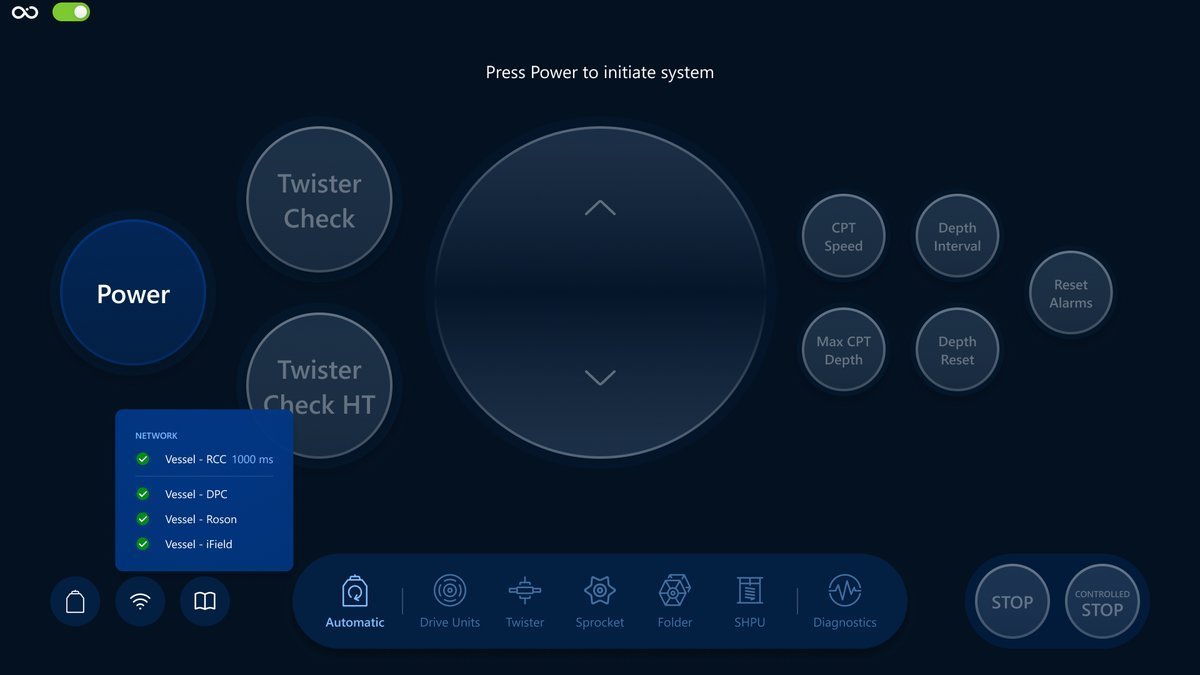
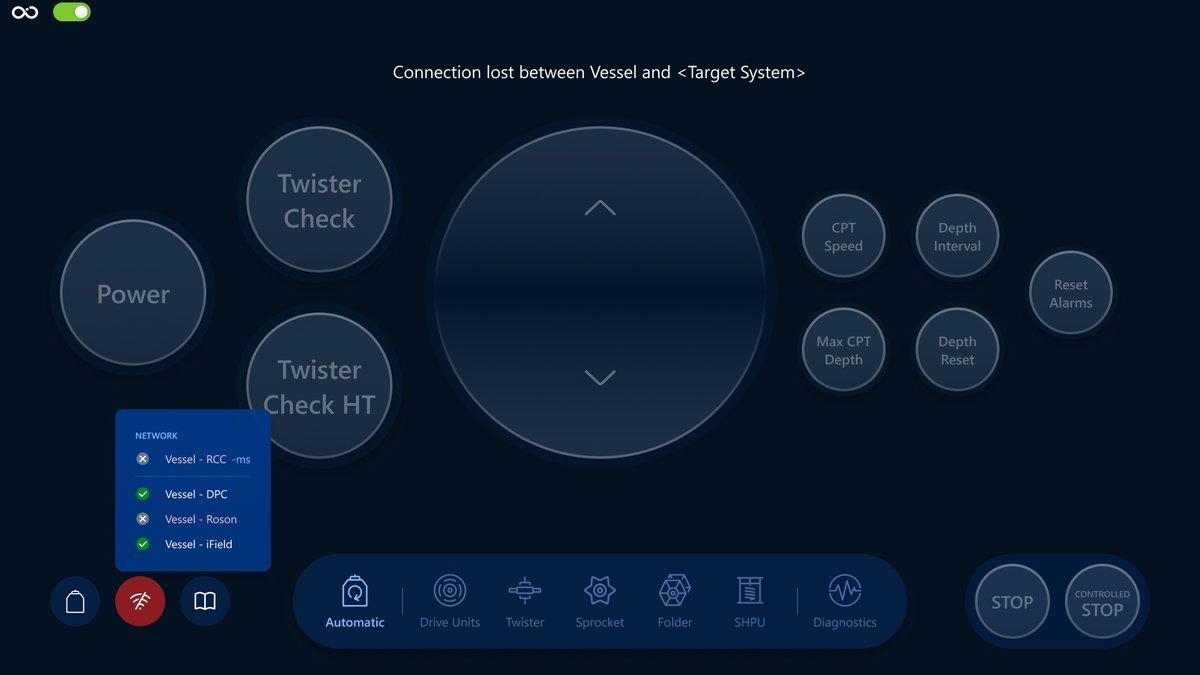
Check the network connection by tapping on a network button. It is important before operating because this tab might have connection errors. For example, in case of a network error between Vessel - Roson or Vessel - RCC, an operator won't be able to press on Power and initiate the CPT Control Software. Make sure you have all the necessary connections before starting the process. More about the network here: Network section.
With established connections you are able to initiate the system:
And here is an example with connection fail and as a result an operator can't initiate the system:
DPC panel
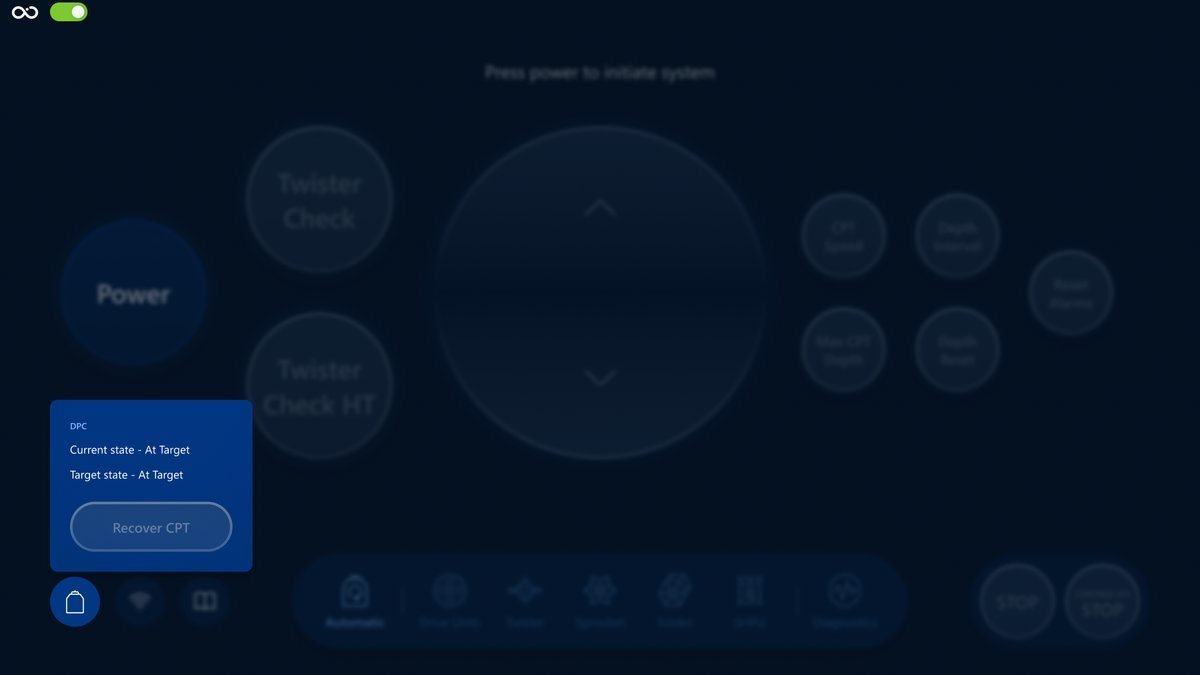
Check the DPC panel by tapping on the DPC panel button. More about the DPC here: DPC Integration.
Navigation
Use the navigation bar to switch between screens. Remember that every button on the other screens is disabled, so you can't click on them until the CPT Control Software is initiated.
Modals
You can open a modal by tapping on some buttons, like CPT Speed. The modal has an input field on the left side and a virtual keyboard on the right.
You can close the modal without saving changes by tapping on the cross button in the top right corner. Also, if you need to remove a character, tap on the backspace button.
Input the value you need and tap on the Done button to apply it. The modal will then be closed automatically.
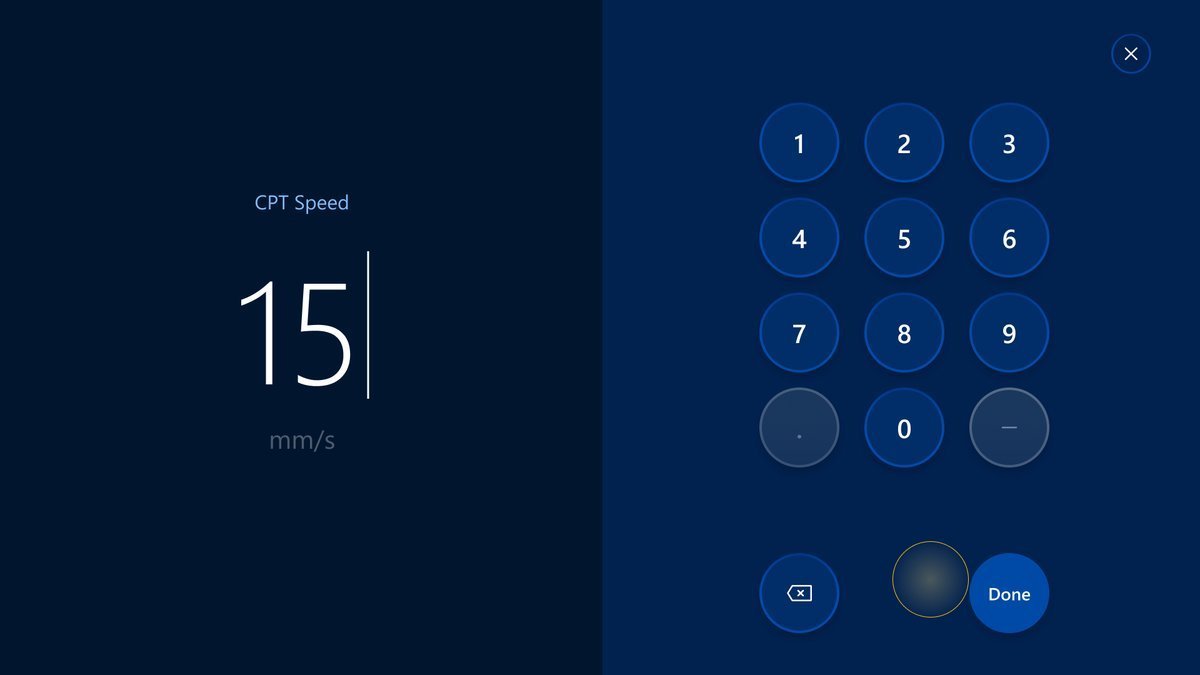
After that, you can track the state of the command by looking at the corresponding button (in this case, CPT Speed) and system status message. If an error occurs, the CPT Speed button will turn into yellow color and then go back to enabled state with the blue color. It means that the value was not saved, and you need to try again.
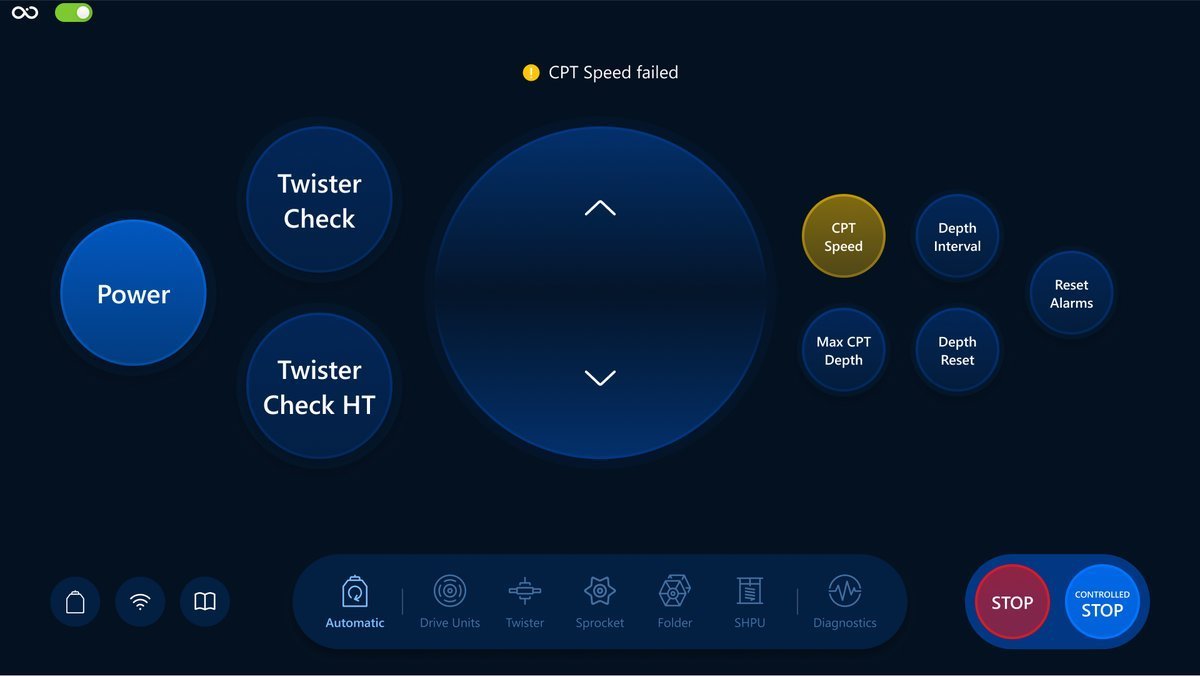
Congratulations! Now you understand how to prepare before using the CPT Control Software. Feel free to have a deeper dive into Automatic mode section by following this link: Automatic screen overview.