Execute a CPT
The following section is a guide on how to execute a CPT.
Before starting a test, it must be in the Prepared state (see Prepare Operation section). Upon starting a test, it will change its state to In progress. Only one test can be In progress at the same time.
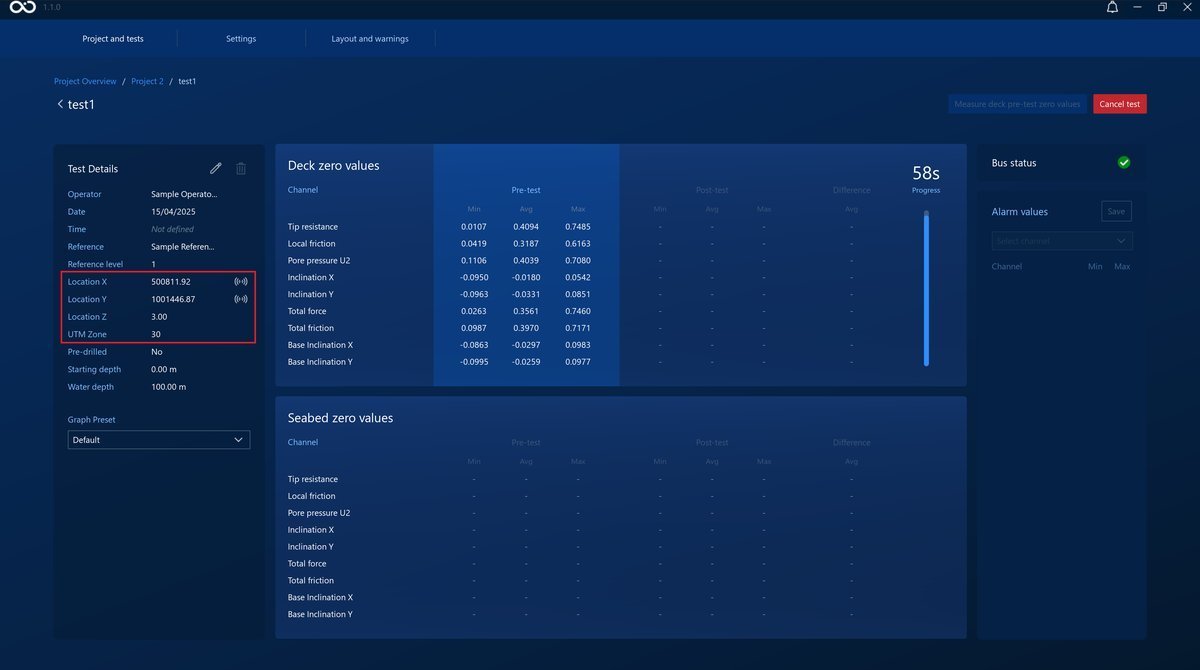
When the Start button is pressed, as long as there is a stablished QINSy connection, Location X, Y and UTM zone fields will stream data received from QINSy, and Location X and Y will also display an icon confirming such connection. If the connection failed, those icons will disappear, the data stream will stop and the user will have to fill the Location X and Y manually.
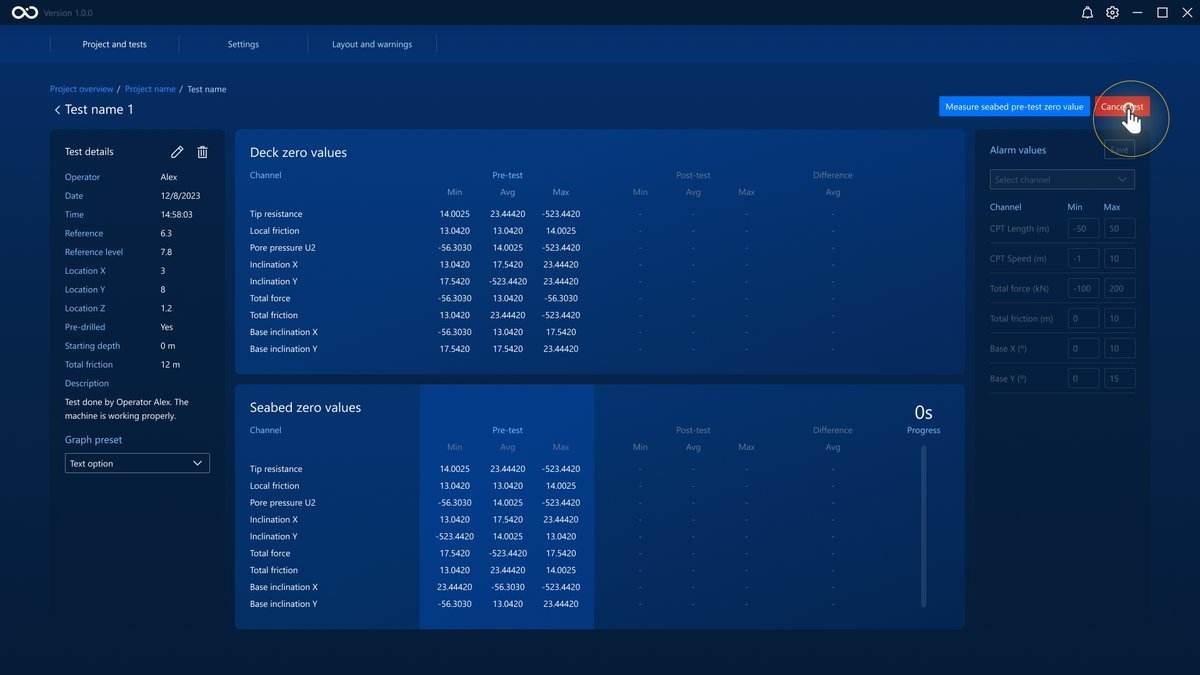
Before the Data Acquisition phase, you can click the Cancel test button. This will restart the test to Prepared. Once the data acquisition starts, you need to complete the test with a completion reason.
Pre-Test Zero Readings
The Pre-Test Zero Readings are the starting step of a CPT test.
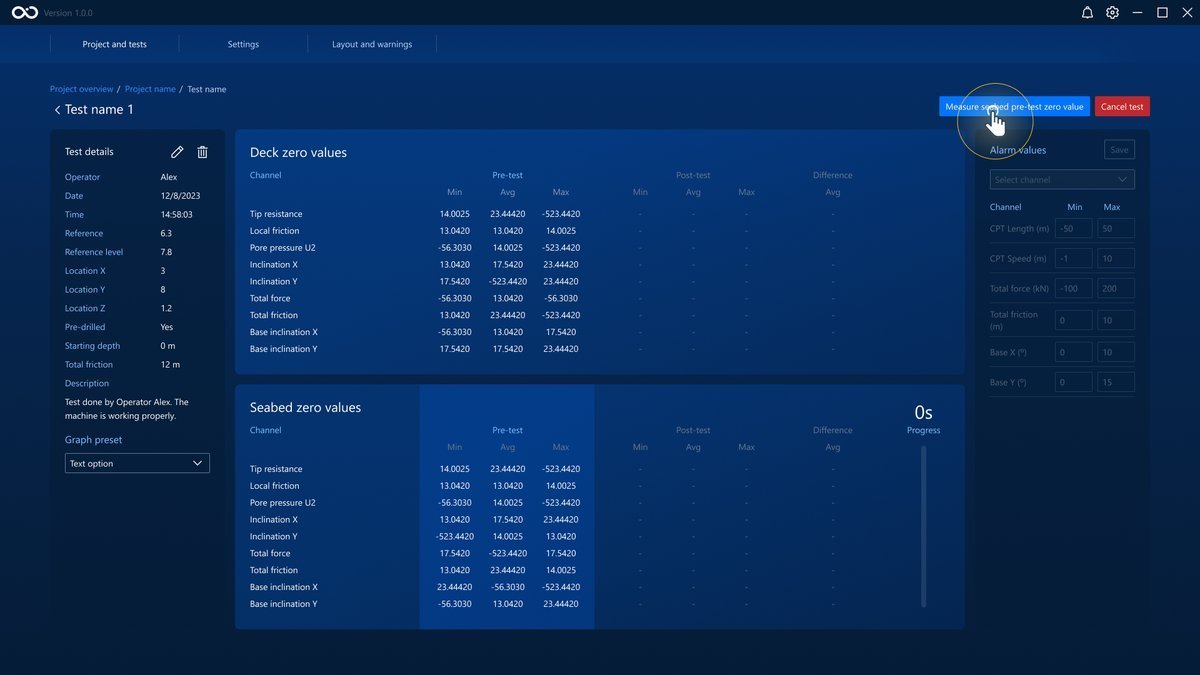
Click the button Start test to begin receiving Pre-test Deck Zero values.
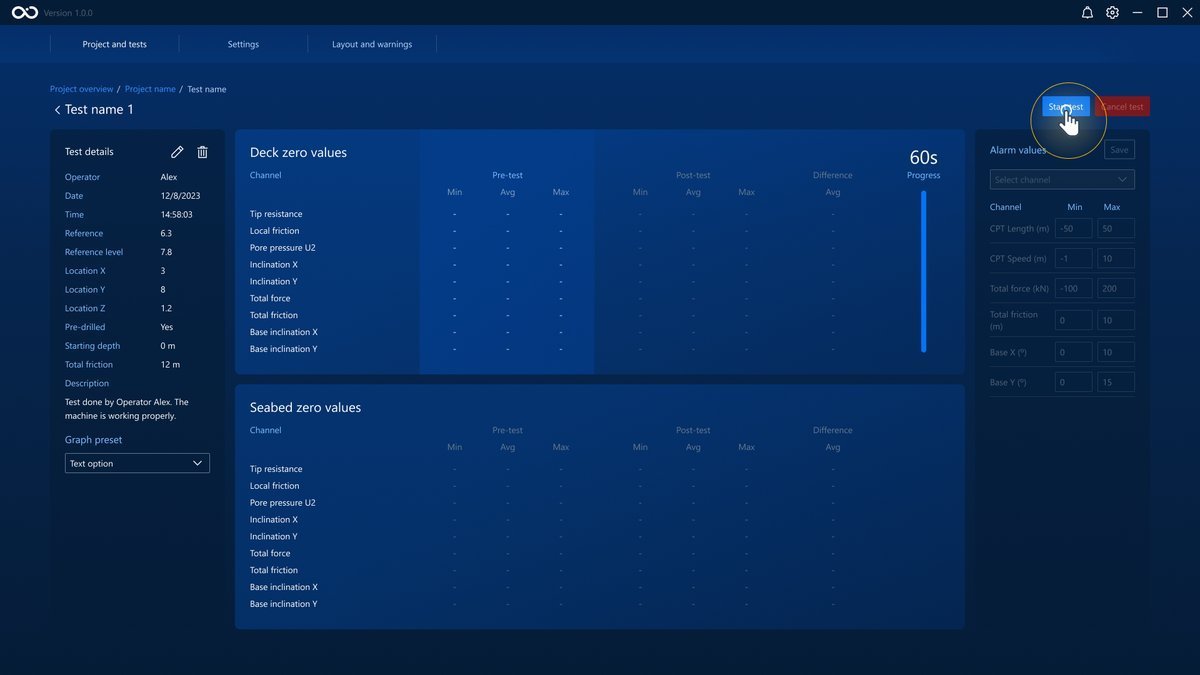
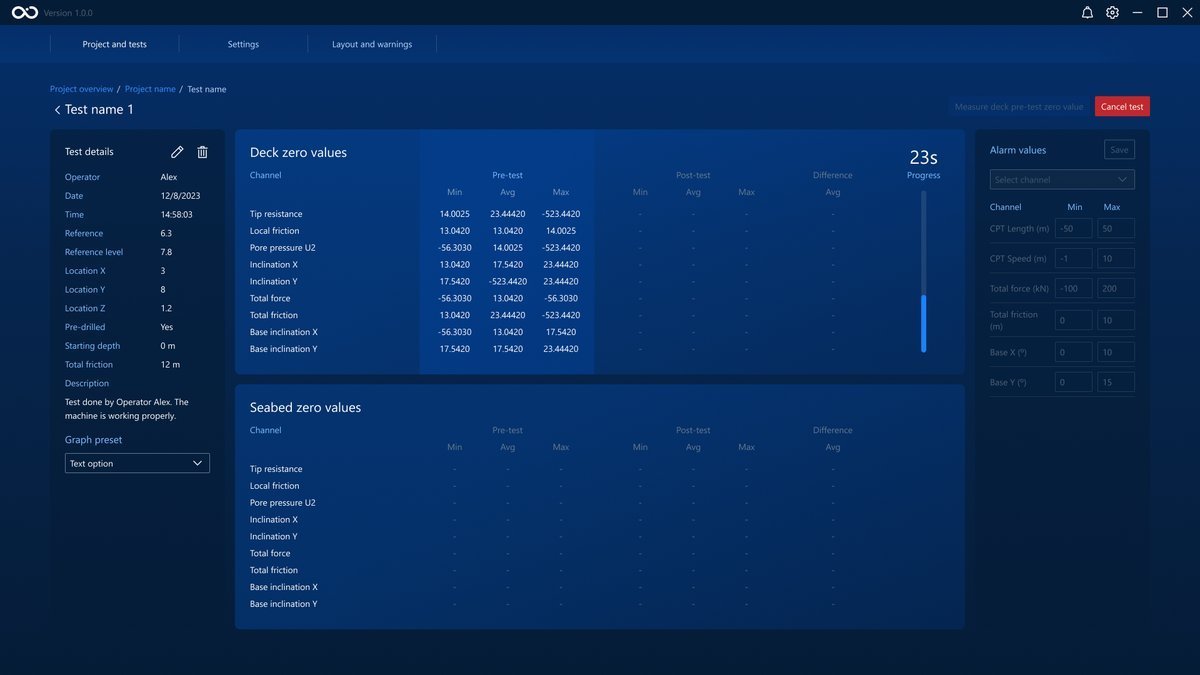
Each set of measurements needs to last at least 60 seconds. You can see how much time is left in the progress bar in the right of each measurement panel.
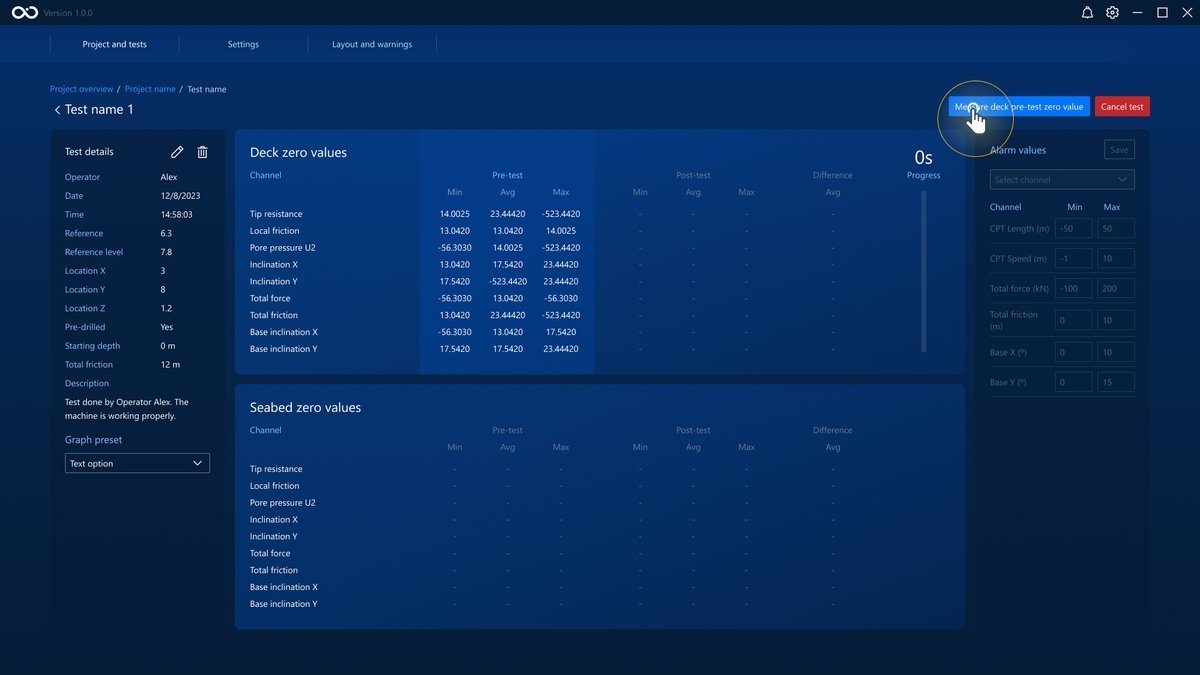
After at least 60 seconds have elapsed, you can register the measurements by clicking the button Measure deck pre-test zero value . The registered measurements are those received 60 seconds directly before clicking the button. This is true for every Zero Reading.
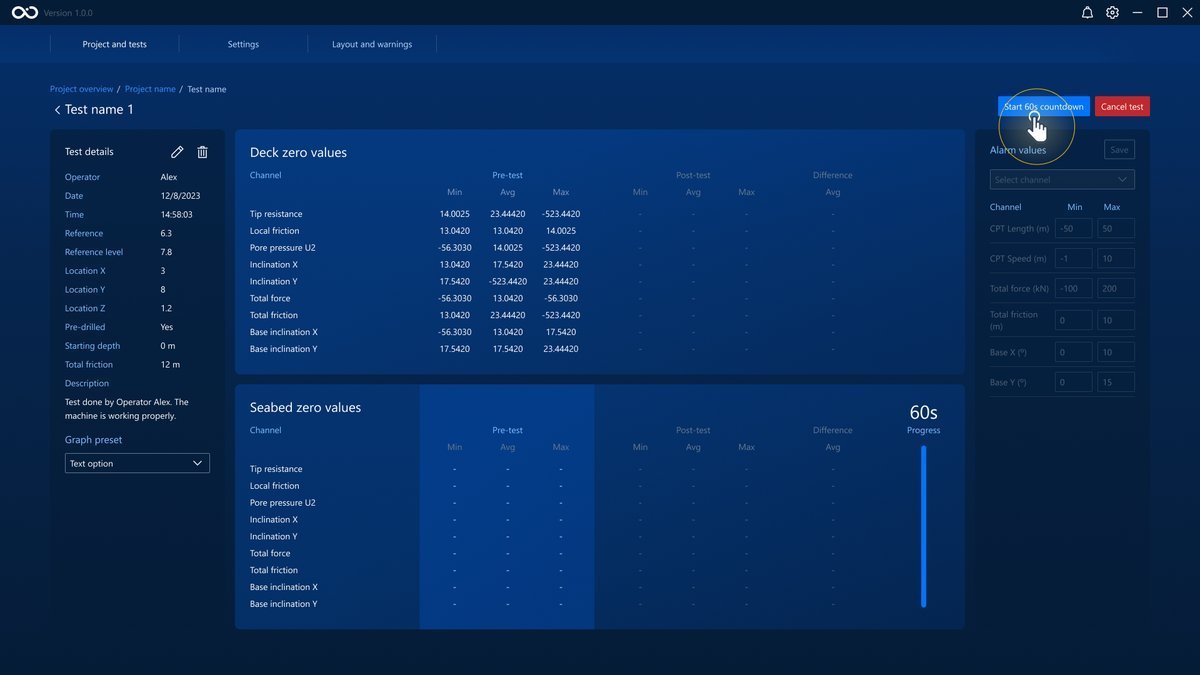
To start receiving Pre-test Seabed Zero values, click the button Start 60s countdown .
After the countdown, register these measurements by clicking the Measure seabed pre-test zero value button.
Data Acquisition
Once the Pre-Test measurements are registered, you will be taken automatically to the Test Graphs page.
On this page, you can see the received data being plotted against depth in the graphs for each preset that was selected previously (see Alarms).
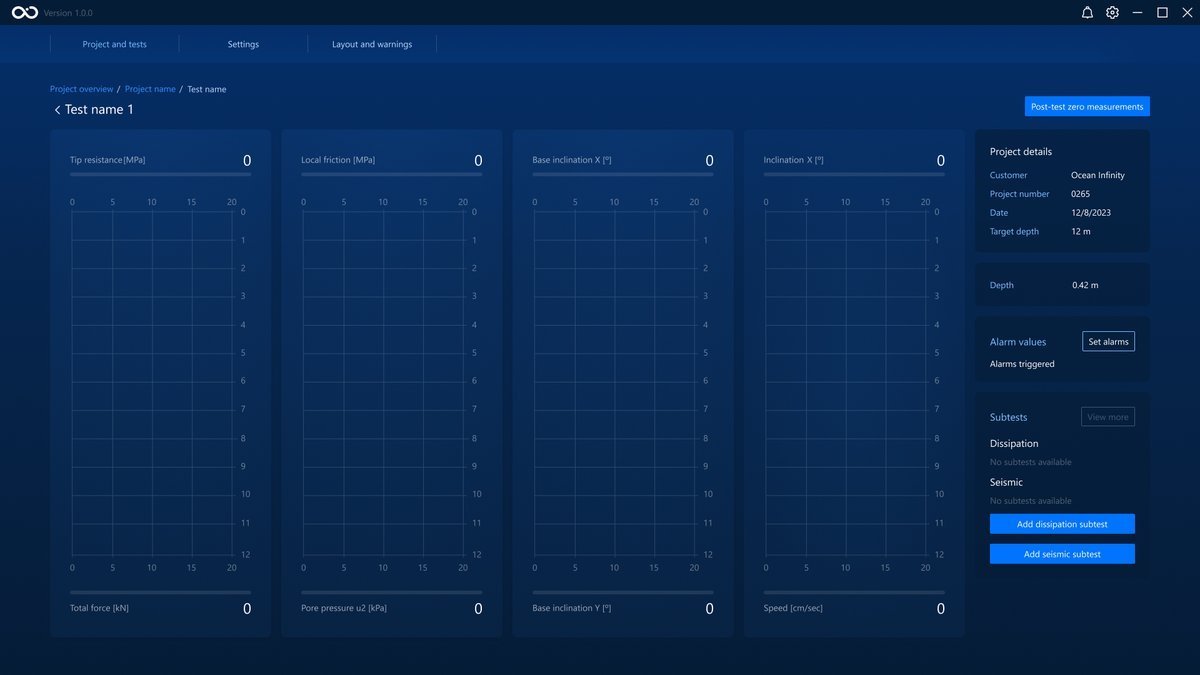
At any point in the data acquisition process, you can revisit the ongoing test or other tests' Test Dashboards. The process will continue in the background. Remember that you cannot start another test while this one is In progress.
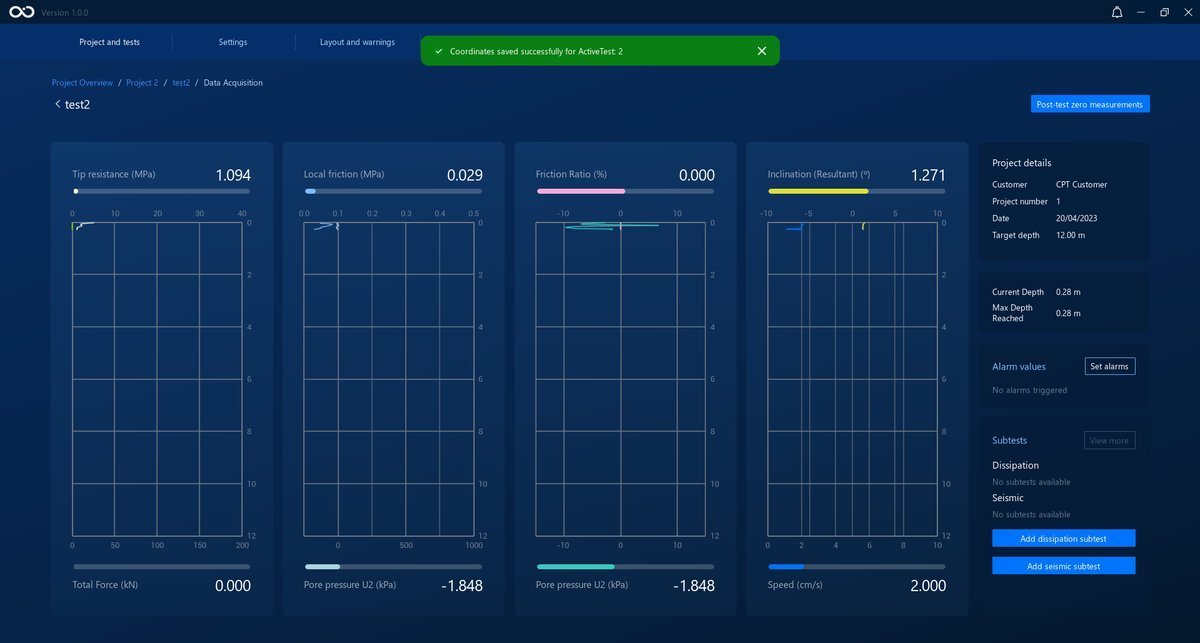
If there is a connection to QINSy, after the depth has reached 10cm, a notification will point out that the coordinates will be saved in the GRU file for the test. In case of QINSy not being connected, a notification will highlight that the coordinates were not saved and you should retrieve the coordinates manually.
You can set Alarms in this phase (see Set an Alarm) for as many channels as you'd like. When a certain channel goes over the minimum or maximum values set in its alarm, it will stop the Data Acquisition. This will also trigger a Controlled STOP on the Roson. To continue, adjust the Alarm values, and Reset the Alarm using the HMI software (see Reset Alarms).
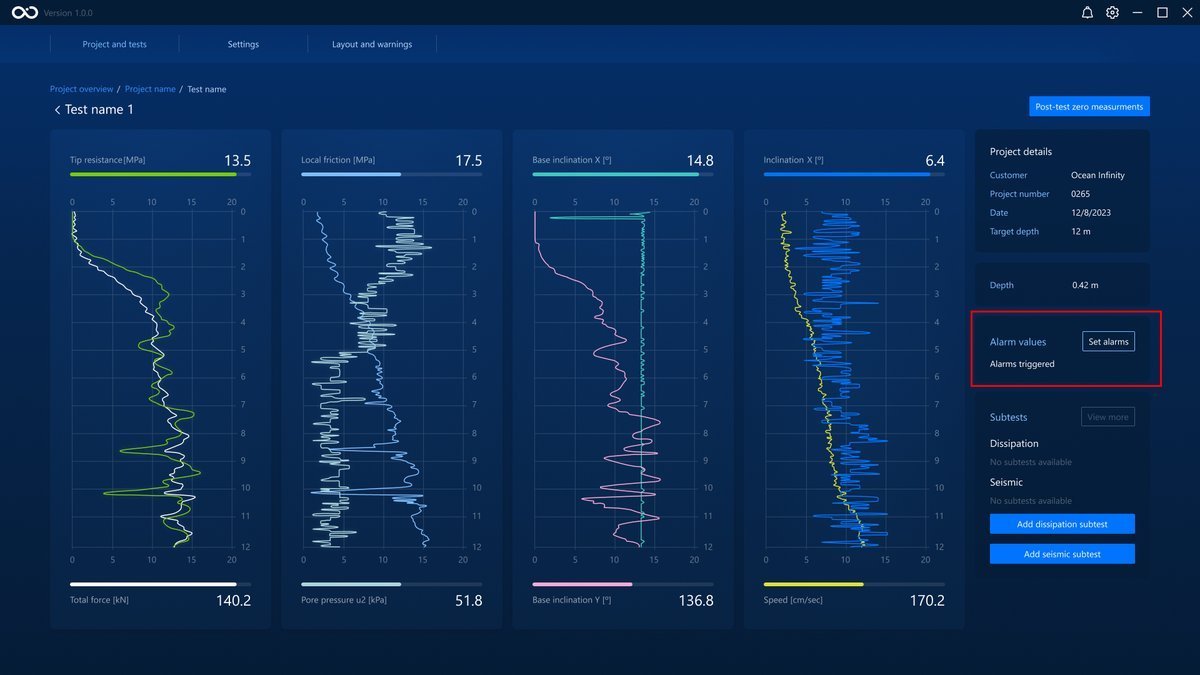
In this phase you can also do dissipation or seismic subtests. Starting a subtest will pause the current data acquisition until you complete the subtest. See sections Dissipation Subtests and Seismic Subtest for more information about the subtests.
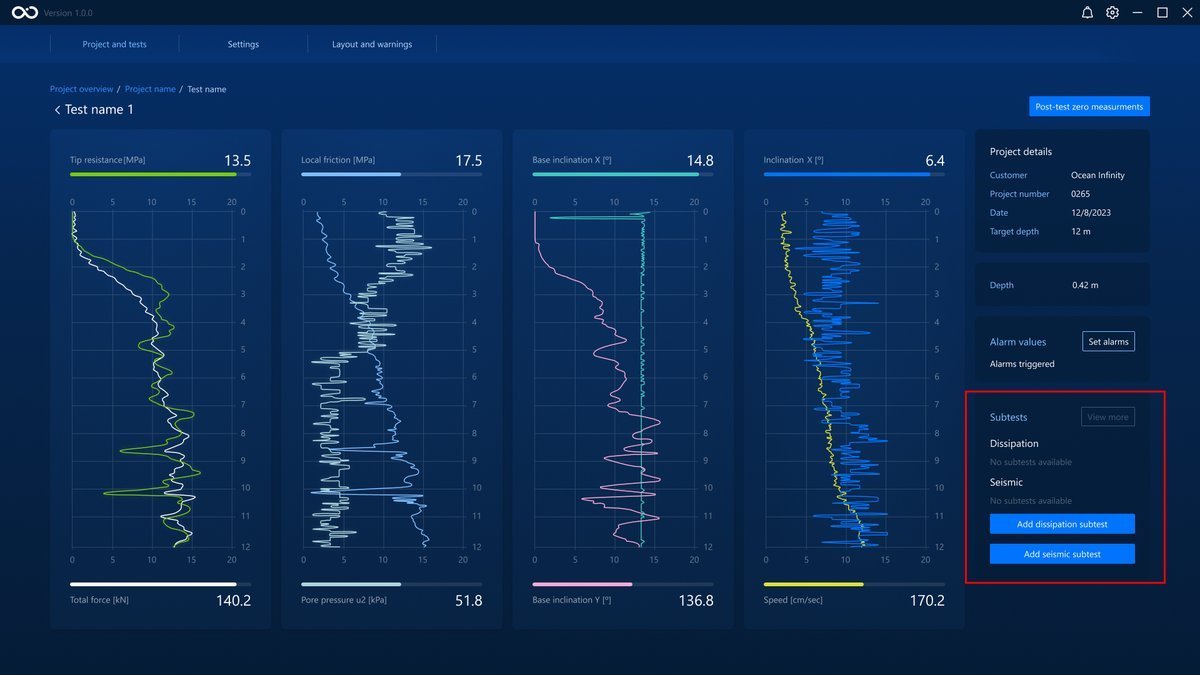
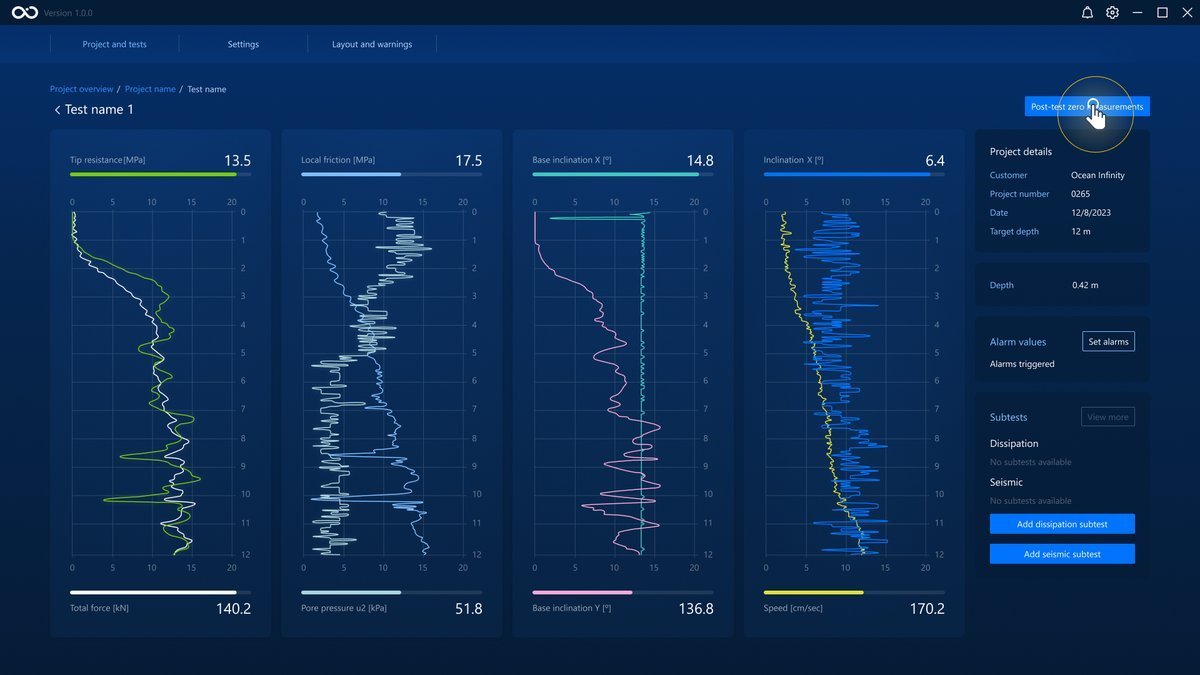
To finish the data acquisition, click the Post-test zero measurements button on the Test Graphs page.
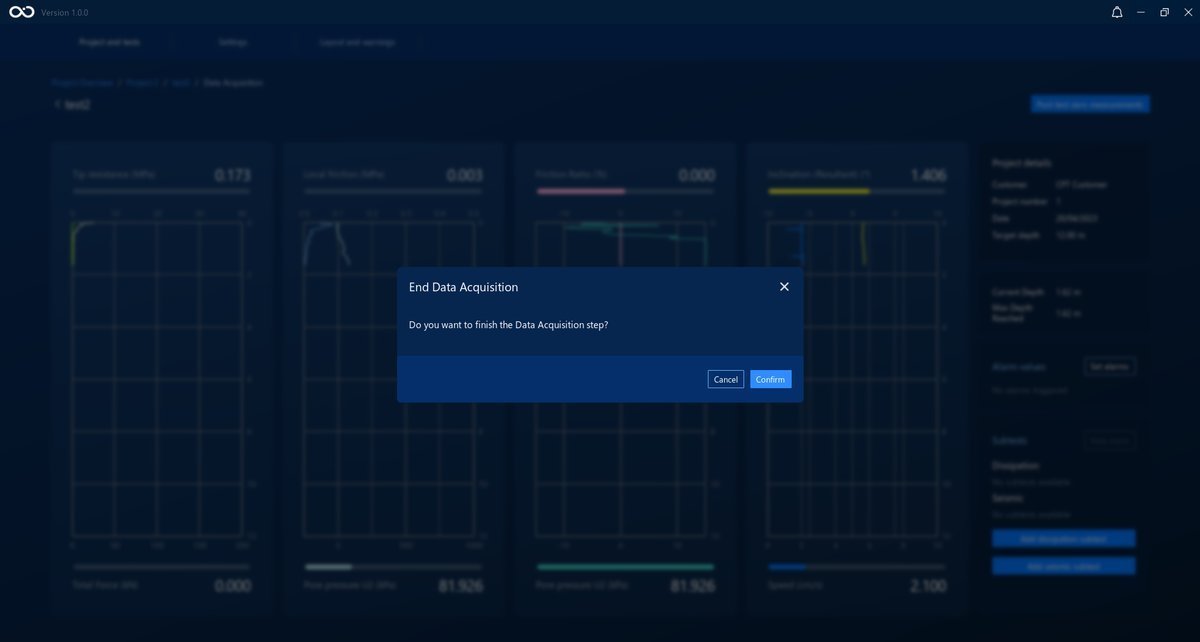
The program will ask for confirmation that you wish to finish the data acquisition. Pressing the confirm button will take you back automatically to the Test Dashboard page and begin the Post-test Zero Readings immediately.
Post-test Zero Readings
The Post-test zero readings and 60 second countdown for the seabed values were started automatically after you finished the Data Acquisition process.
You can revisit the Test Graphs page once these Post-test Zero readings are completed.
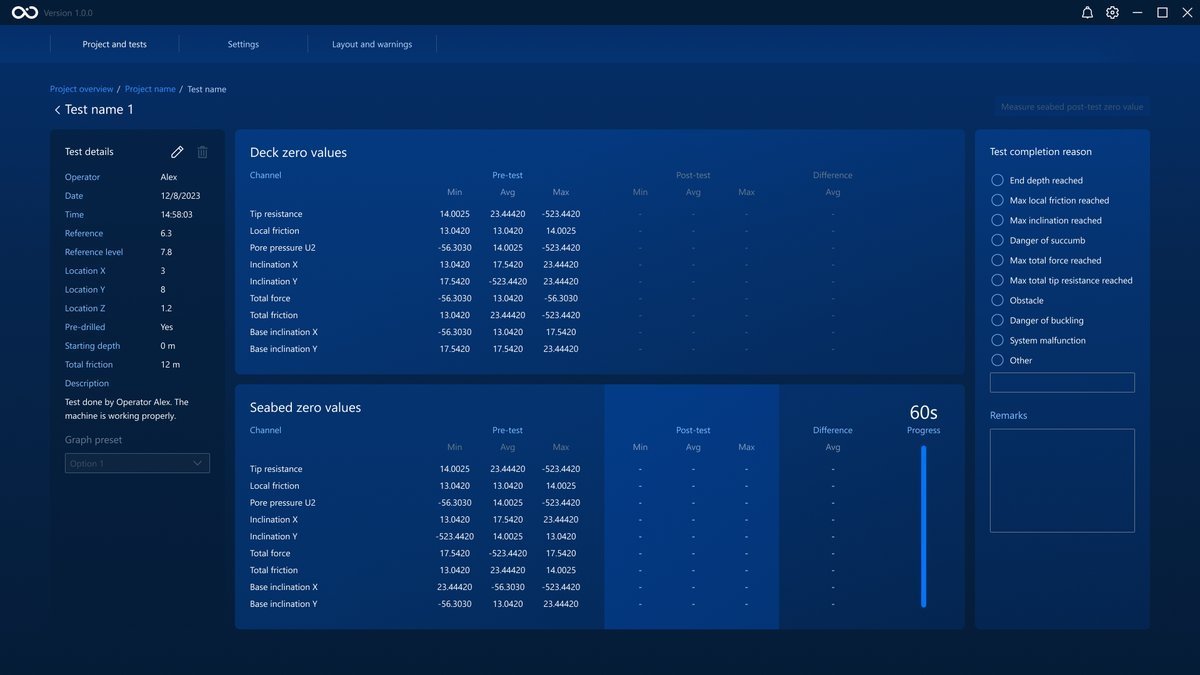
To register the zero values, click the Measure seabed post-test zero value . The difference between the pre-test and post-test values will be shown on the right side of the measurements.
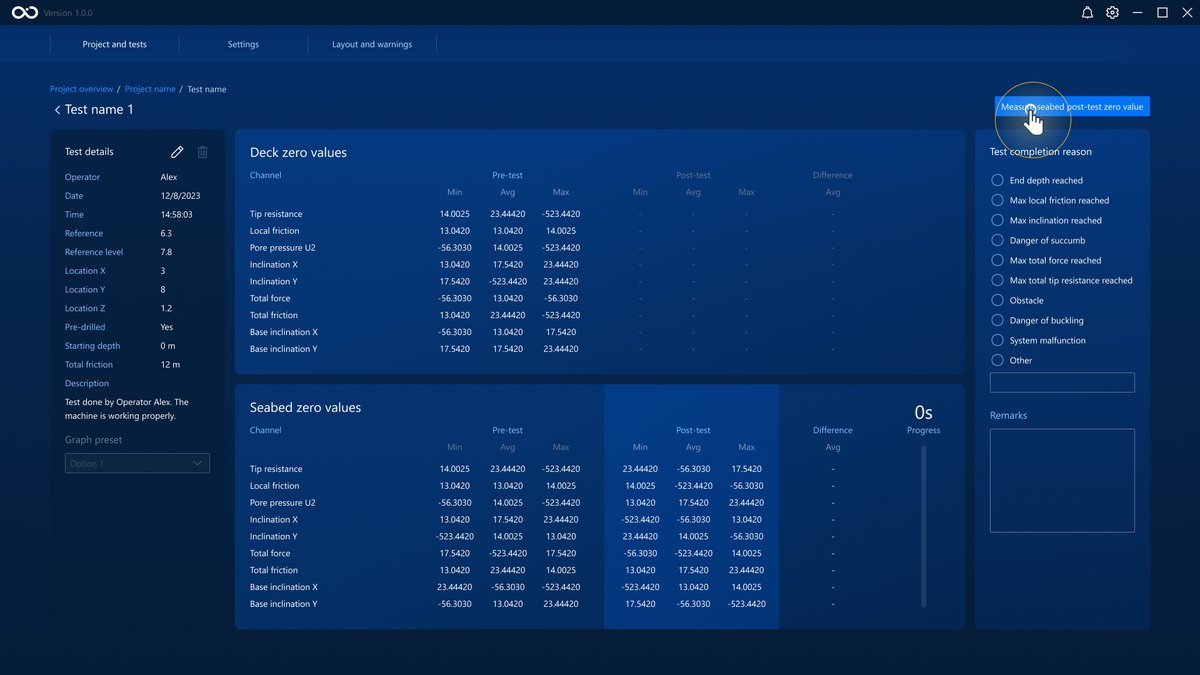
Click the Start 60s countdown button to start the countdown and start receiving post-test Deck Zero values.
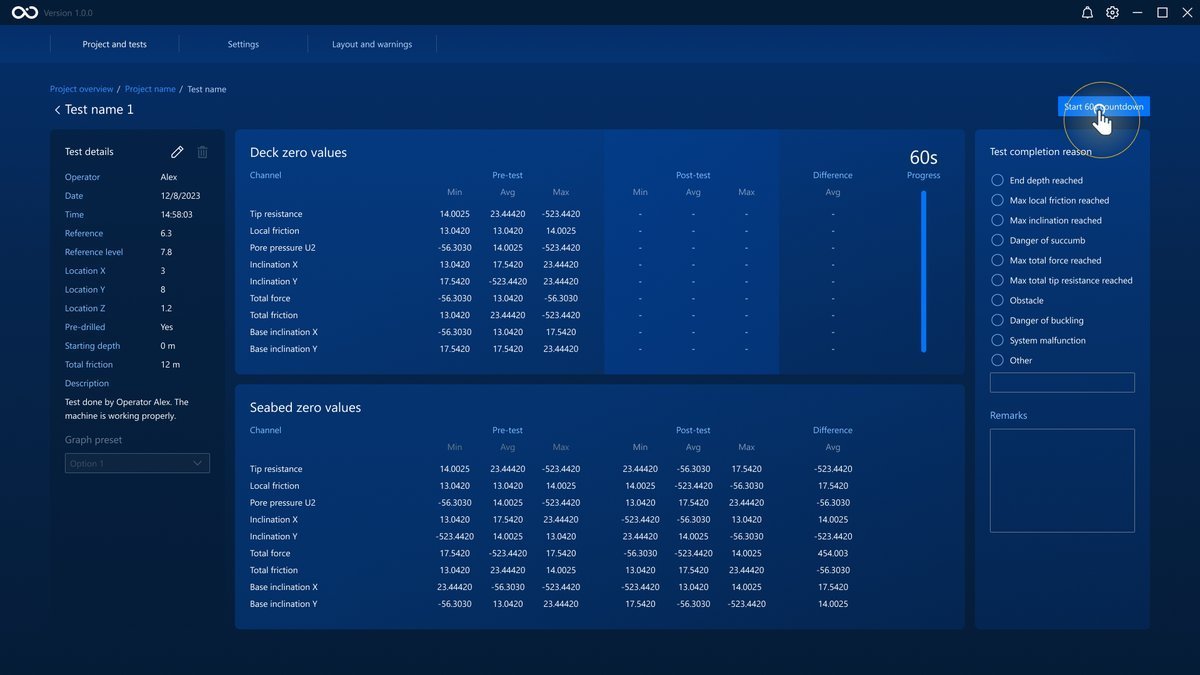
To register the zero values, click the Measure deck post-test zero value .
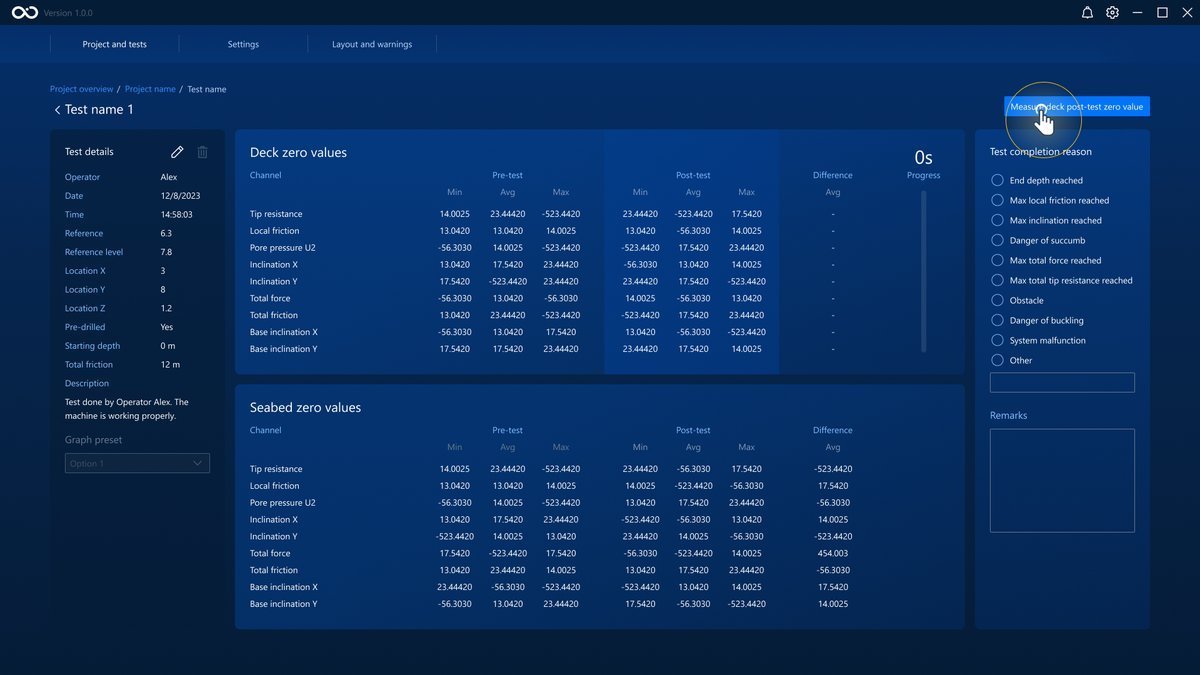
Complete the Test
Note
If the test finishes or errors but Complete test isn't pressed before the API disconnects, the test becomes Invalid and you'll be returned to the Project Overview automatically — see When a test becomes Invalid.
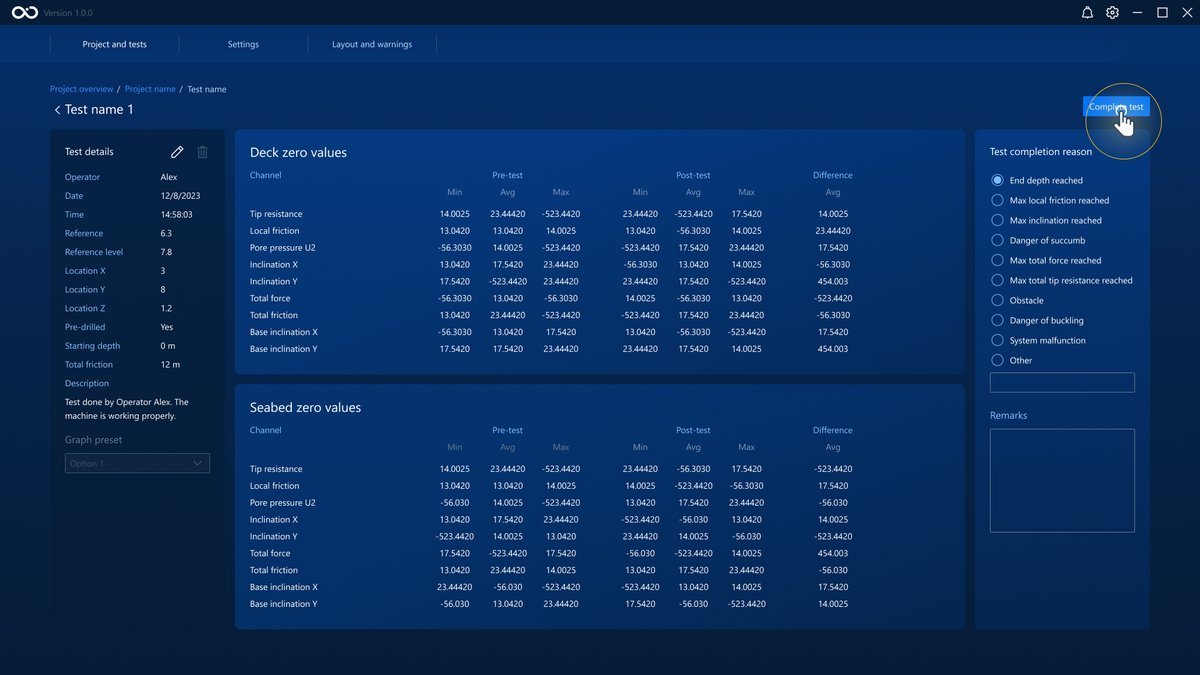
To complete the test, first, choose a Completion reason on the panel on the right. Depending on the reason, the test will either be Completed or To Review (see Completion reasons). A text box is also available to write any additional remarks.
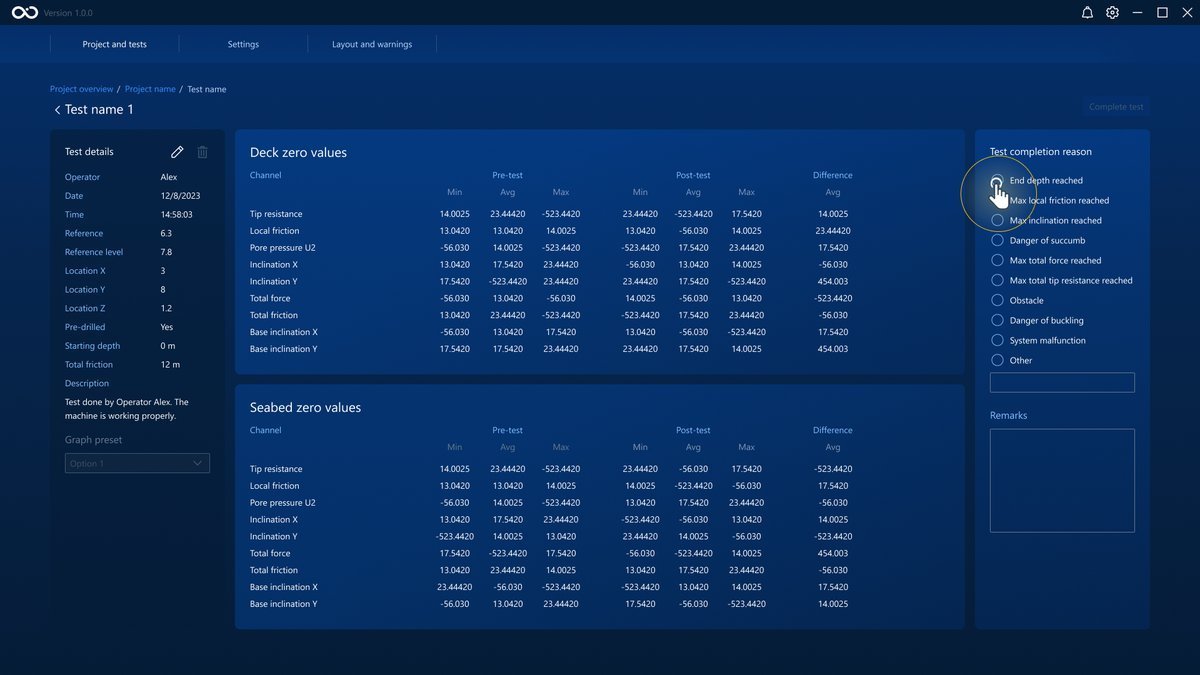
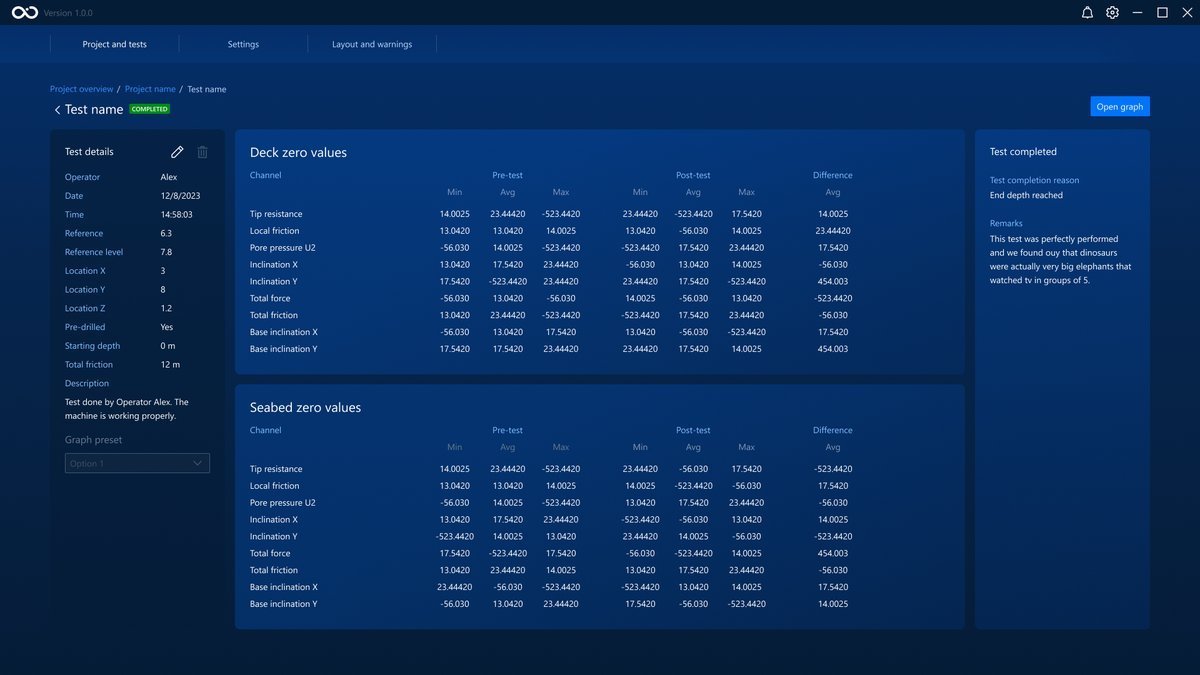
Then, click on the Complete test button. The test will now be marked as either Completed or To Review in the Project Dashboard and on the Test Dashboard.